

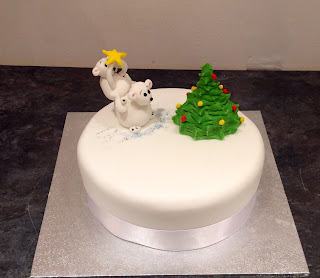
To make the Polar Bears decorating the Tree scene on an iced and marzipanned cake, you'll need:
- Sugarpaste in white, green, red, black and yellow
- 25-50g of Icing sugar
- Black icing pen ( a foodie felt tip to decorate with!)
- Pink lustre powder
- Edible glitter
- Little cup of water
- Paintbrush - small one preferably if you can find one!
- Star shaped cutter
- A piping nozzle - any will do
- Coloured ribbon of your choice
- Headed pin or double sided sticky tape to seal your ribbon!
- Pair of Scissors
Form a ball of green sugarpaste and knead it gently on a surface lightly dusted with icing sugar to make it more pliable.
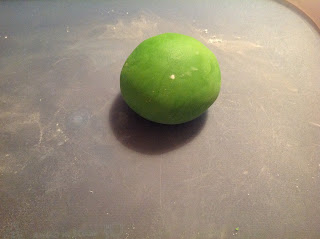
Then gently begin to squeeze the paste into a teardrop shape, by gently massaging the sugarpaste between your hands.

When you're happy with the height of the paste ( which will be the height of your tree) begin to make small incisions in the tree and flick the 'leaves' upwards.
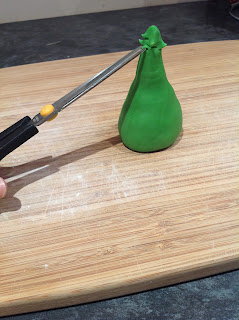
Continue all the way down the tree, making the incisions thicker as you move lower down.

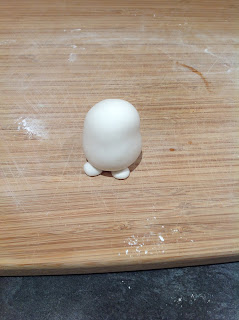
Once you're happy with your tree, pop it to the side and start working on your polar bears! To begin, form a smooth ball.

Pinch the ball in the middle, so it is slightly narrower ( this will be the bear's belly!) 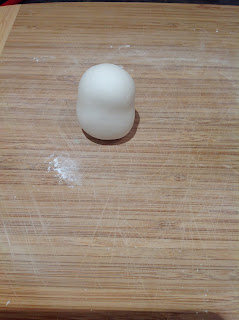
Then create four little balls - our bear's ears and feet!

Flatten out the edges of one side of two of the balls and dampen them with water ( using your paintbrush).

Then using a sugar craft tool or a knife, make indents on the feet.

Colour these indents in with the edible food pen.

Then make another slightly smaller ball and pinch the middle in, just like before - to create another bear belly.

Using water ( and a cocktail stick if required) place this ball on top of the larger sugarpaste torso, but at a slight angle, so we can pop the head on in a minute.

Make another ball of paste and massage into it a slight snout shape.

Using the end of your paintbrush, indent your remaining two mini balls and carefully colour the inside of the indentation with some pink lustre dust.

Then pop the end of your paintbrush into the side of the sugarpaste head for the ears and then hollow out some eye sockets on your bear. Using the reverse end of a piping nozzle, imprint a little mouth onto your bear. Then follow these lines with your black edible pen.


Attach with a cheeky dab of water onto the lower bear. Use a cocktail stick to secure it if it keeps jumping off! Repeat this process to make a second, slightly smaller head for the baby bear on top.

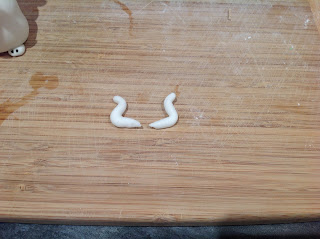
Make small but deep holes in the sides of the big bear and using water, place the arms in, also gluing the paws to the baby bear on top.

Repeat to make some out reaching arms for baby bear.

Then cut out a star with a small cookie cutter and secure to baby bear's arms with a dab of water.

Make little balls of black sugarpaste icing and gently push into the prepared holes in each of the heads.
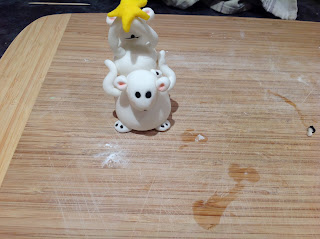
Sketch on some expressive eyebrows and give your bears a little colour with some pink lustre on their cheeks! Then pop to the side.

Attach some little balls of coloured sugarpaste to the tree and dust merrily with edible glitter of your choice. I added some texture to the bottom of the tree, by making some of the cuts quite rough, this creates the impression of woodiness.

Give your iced cake one final rub over, as you decide where to position your bears and tree!

Place a bit of water on the icing surface and then carefully transfer the figures to where you want. I added some blue glitter around the bears, I truly adore edible glitter - so it was a no-brainer splattering it around the place, but the choice is yours!
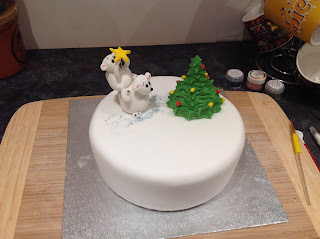
Finally choose a ribbon you like and fasten it around the cake.
There you have it, two polar bears adding the final touch to their Christmas Tree! Enjoy!
Decorate your cake however you feel you want to, you can do all sorts of things - even penguins!

Troubleshooting..
- If bits and pieces keep falling off, use a cocktail stick to sneakily secure them in place, no one will see and it's ever so annoying when you've worked so hard, so make life easier! Of course, don't let small children eat the decorations if you've used them!
- If you don't have a paintbrush, use a cotton wool bud instead - works just as well
- Any colour from the sugarpaste that transfers to your hands will come off if you squirt a bit of lemon juice on them, be careful not to stain your lovely white icing!
No comments:
Post a Comment